【Vulkan】NVIDIAのVulkanヘルパーライブラリのサンプルを動かしてみる
こんにちは、情熱開発部プログラム1課の高江と申します!
6月末でロジカルビート入社1年となり、今回このブログは初投稿です。よろしくお願い致します!
皆さんはVulkanを使ってプログラミングをされたことがあるでしょうか?
今回は、Vulkanに関連するライブラリについて紹介したいと思います。
目次
Vulkanとは
ゲーム開発の仕事をされている方にとってはVulkanを知らない人はいらっしゃらないと思いますが、軽く説明しておくとVulkanは、次世代低レベルグラフィックスライブラリです。
マルチプラットフォームに対応しており、Linux、Windows、Androidなどでも使うことができます。尚、Vulkanは、OpenGLの後継ライブラリとなります。
少し話が反れますが、OpenGLは元々アメリカのシリコングラフィックス社が開発したIrisGL(アイリスジーエル)というグラフィックスライブラリが元になっています。
シリコングラフィックスはNINTENDO 64のプロセッサーを任天堂さんと共同開発したグラフィックスワークステーションメーカーで、今日の3Dグラフィックスの礎を築いたと言っても過言ではありません。
もし興味がありましたら、そのあたりの歴史を辿ってみるのもおもしろいかもしれません。
さて、このVulkanですが私の個人的な印象ではあまりゲーム業界でも使われていない気がします。VulkanのSoftware Development Kit(SDK)をインストールしサンプルプログラムをビルド、実行した方ならわかると思いますが、とにかく初期設定やら仕組みが複雑でなかなか理解するのも難しいものとなっています。私もVulkanのCubeを回転させるサンプルを実行してみましたが、Cubeを回転させるだけで3000行以上のコードがあり面食らった記憶があります。
そんな敷居の高いVulkanですが、あまり知られていないのかもしれませんが、実はNVIDIAさんからVulkanのヘルパーライブラリが公開されています。
Vulkanヘルパーライブラリ(nvpro_core)
Vulkanのヘルパーライブラリというのは何かと言うと、簡単に言えばVulkanの煩雑な初期化コードや複雑な仕組みの部分を少し使いやすくしたラッパーライブラリと言えます。
githubでnvpro_coreというリポジトリで公開されています。
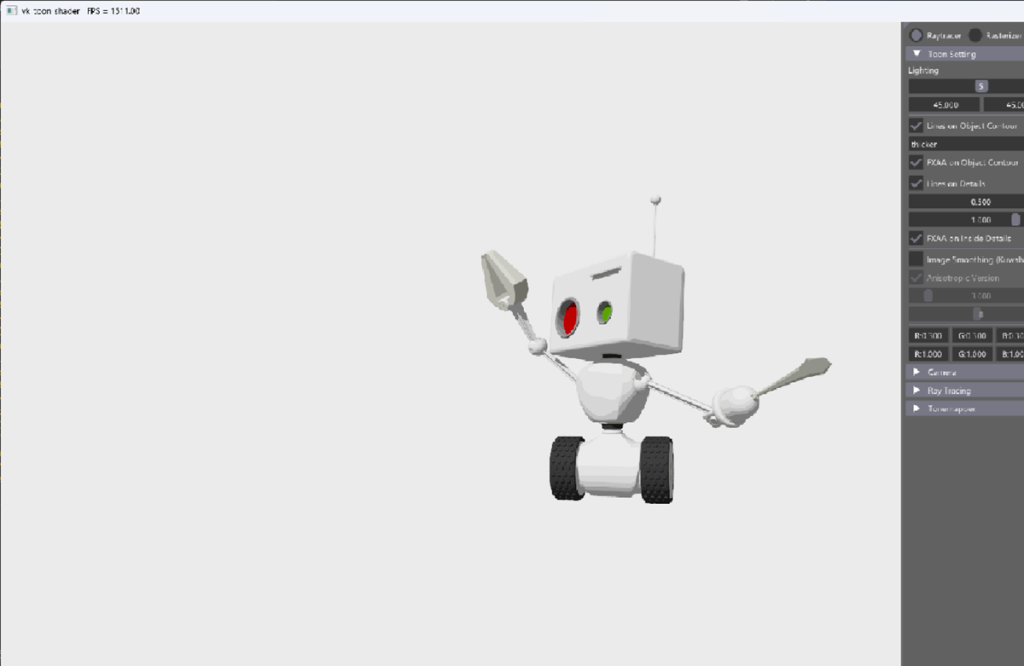
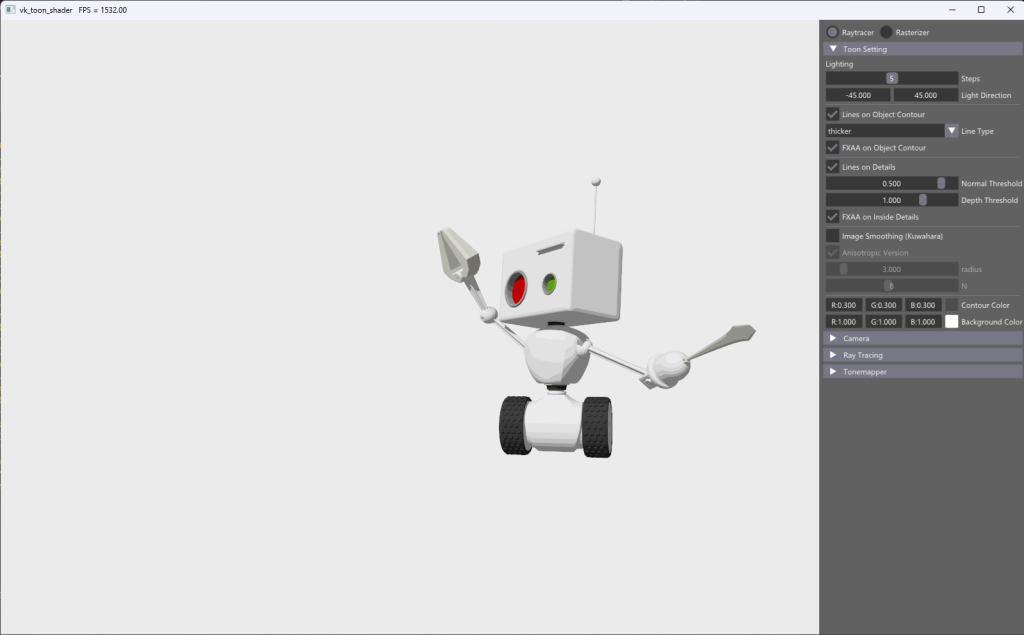
今回はこのヘルパーライブラリーのビルド環境を構築しサンプルプログラムを見ていきたいと思いますが、以下の画像がヘルパーライブラリで描画されたロボットモデルのサンプルです。このサンプルはサンプルのうちの一つで他にもたくさんのサンプルが用意されています。
ビルド環境の構築
それでは、ヘルパーライブラリのビルド環境を構築していきたいと思いますが、OSはWindows11を想定しています。またあらかじめインストールしておいて頂きたいアプリケーションがあります。Git、CMake、Vulkan SDKをあらかじめインストールしておいて下さい。
Git: 私のバージョンは2.48.1でしたがLatestバージョンでも問題ないと思います。
CMake: 私が使用したバージョンは、3.31.8です。CMakeのLatestバージョンは4.0.3ですが、ビルド環境のConfig時にエラーが出る可能性もあるため、私が試した3.31を使用されるのが無難だと思います。
実行環境
CPU: Intel 第10世代 Core i 7
GPU: NVIDIA Geforce RTX 3060
ライブラリとサンプルをCloneする
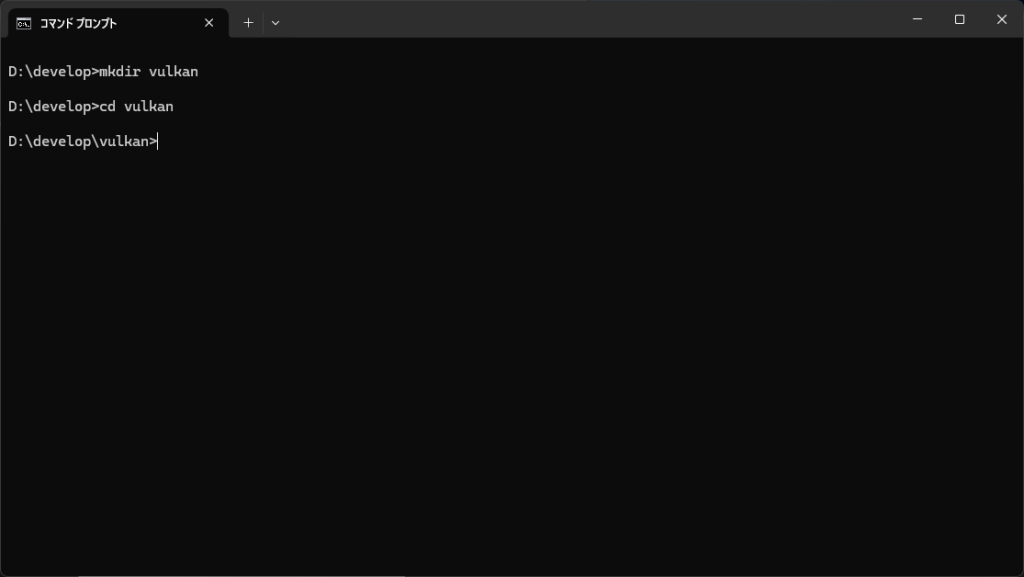
まずは、Windowsのコマンドプロンプトを起動して下さい。ライブラリとサンプルをCloneするディレクトリはどこでも構いませんが、私は以下の画像のようにD:\develop\vulkanにCloneすることにしました。
コマンドプロンプトで以下のコマンドを実行します。もしGitのパスが通っていない場合、CloneできないのでGitをコマンドプロンプトから使用できるようにパスを設定して下さい。成功すると画像のようなメッセージが表示され終了します。
git clone https://github.com/nvpro-samples/build_all.git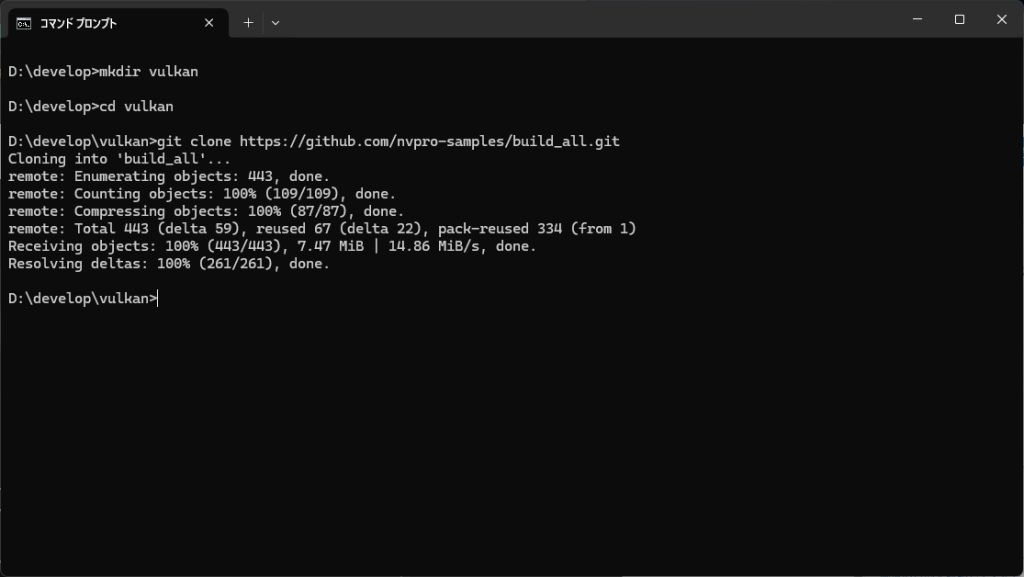
次に、cd build_allを入力しディレクトリを移動します。次にdirを入力するとファイルリストが表示されます。リストの中にclone_all.batというファイルが存在することを確認して下さい。
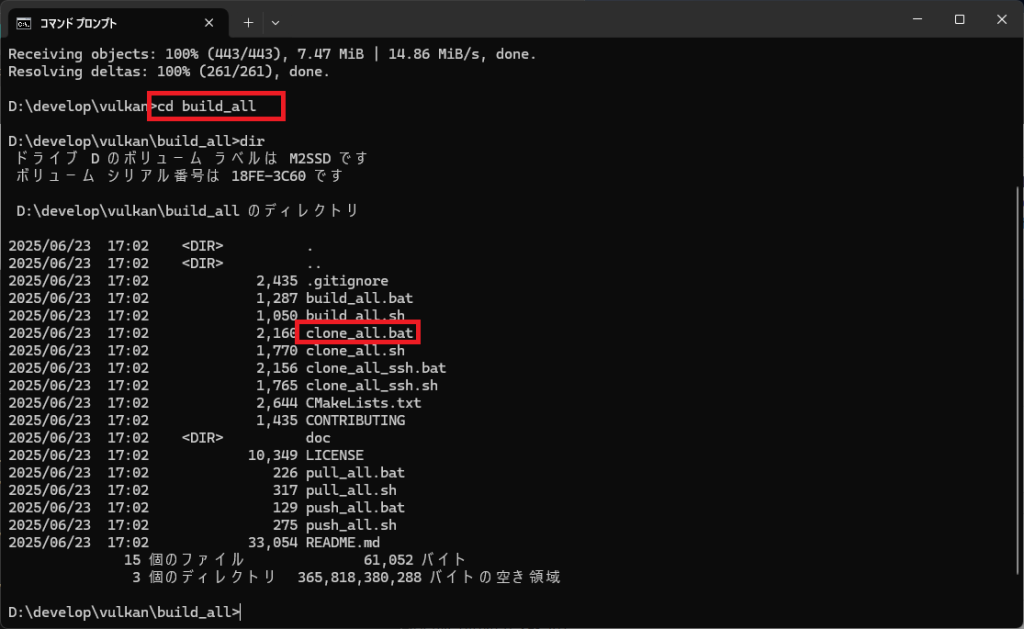
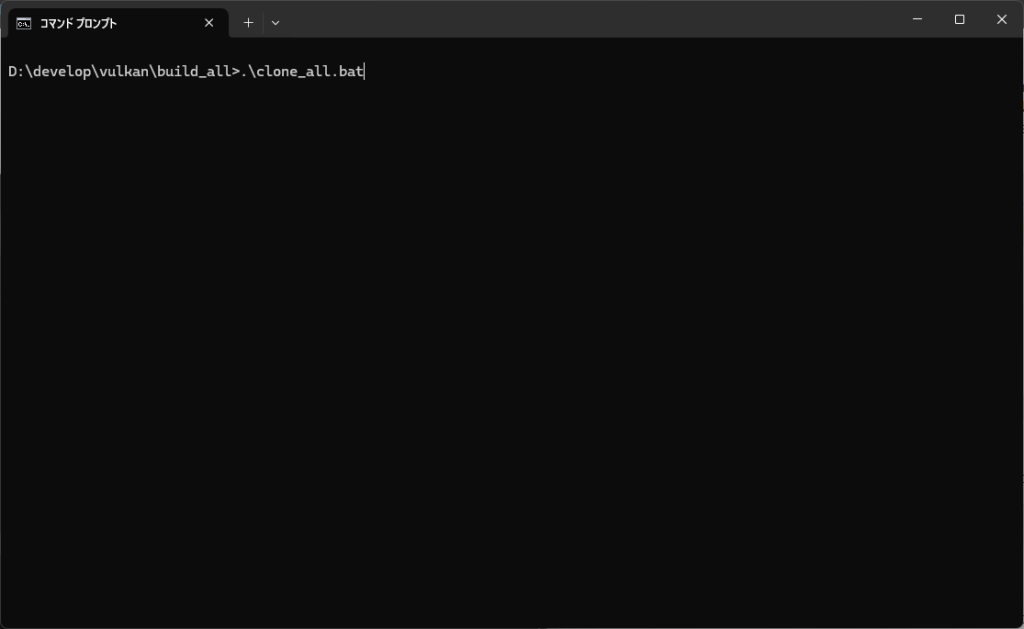
次に、以下の画像のように、clone_all.batを実行します。このバッチファイルはサンプルプログラムとヘルパーライブラリの全Cloneを行いますので、通信エラーなどがない限りはエラーなどは発生しないと思います。もしCloneができていないようであれば、通信環境などを確認して再度、clone_all.batを実行して下さい。
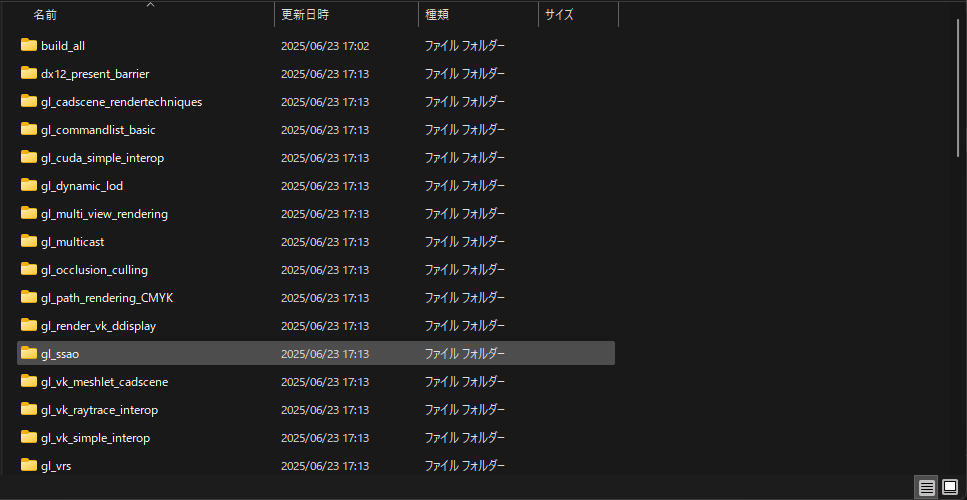
Cloneが成功すれば、build_allディレクトリの上に多数のサンプルプログラムができているはずです。サンプルとしては51個あるはずです。
サンプルプログラムのビルド環境構築
ようやくサンプルのところまで辿り着きました。今回は先ほど貼り付けていたロボットモデルが表示されたサンプルプログラムを動かしてみようと思います。サンプルの中にvk_toon_shaderというディレクトリがありますが、ここでまだやることがあります。CMakeでVisual Studioのビルド環境を構築します。またコマンドプロンプトでの作業になりますが、もう少しです。
以下の画像のように一気に作業します。
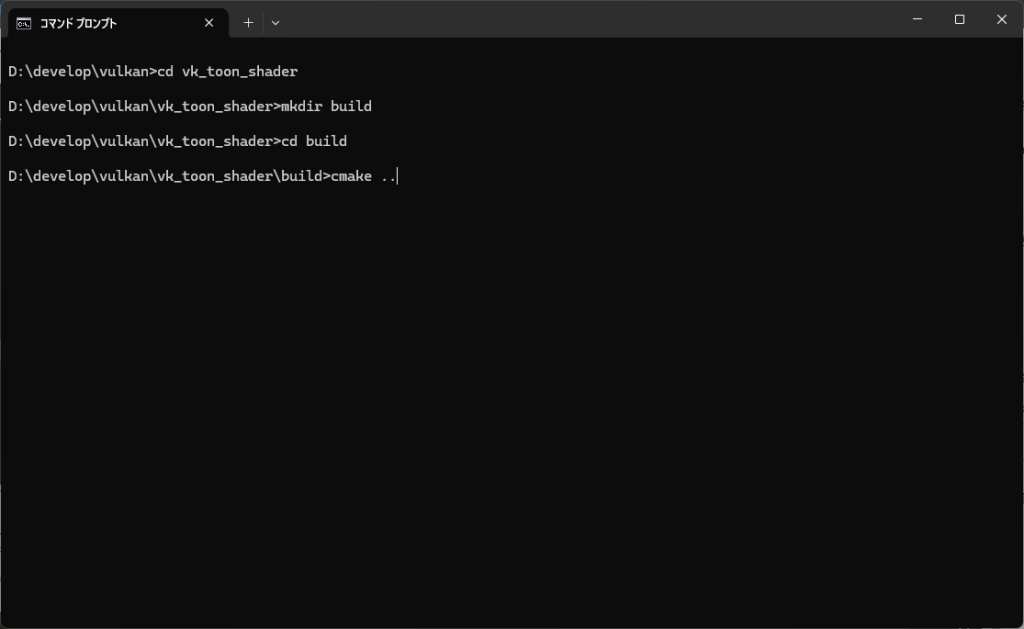
念のため、入力するコマンドをコピーペーストできるように以下にコマンドを記載します。
cd vk_toon_shader
mkdir build
cd build
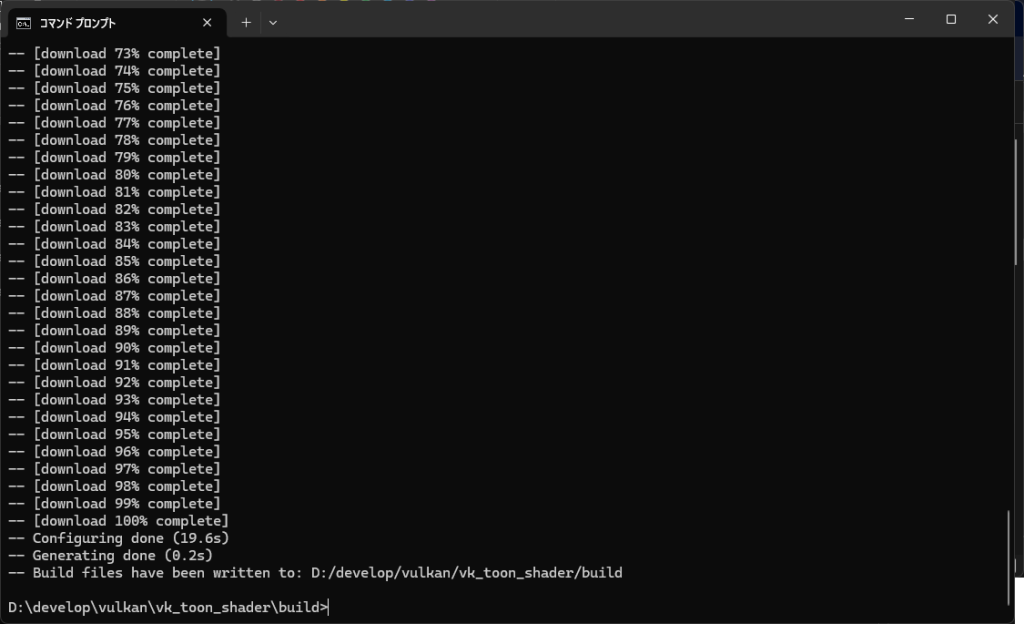
cmake ..Cmakeの実行が正常に終了すると以下のような画像で終了します。もしエラーが発生している場合は、Visual Studioのビルド環境が構築されないのでエラーを解決する必要がありますが、CMakeのバージョンが古すぎたり新しすぎたりするとエラーが出ることがありますので、CMakeのバージョンを私が確認した3.31.8をインストールしてみるなどして下さい。
CMakeとは
ここで念のためCMakeについての簡単な説明です。CMakeは、プラットフォームに依存せずビルド環境を自動生成してくれるツールです。WindowsであればVisual Sutido、iOSであればXCode、Linuxであればmakeといったプラットフォーム独自のビルド環境が必要になりますが、CMakeはプラットフォーム毎のビルド環境を自動生成してくれます。今回のnvpro_coreのサンプルはWindowsで実行しますので、cmake ..を実行するとVisual Studioのビルド環境がbuildディレクトリに自動生成されます。マルチプラットフォームのオープンソースなどではCMakeに対応したものが多いと思います。
サンプルを動かしてみる
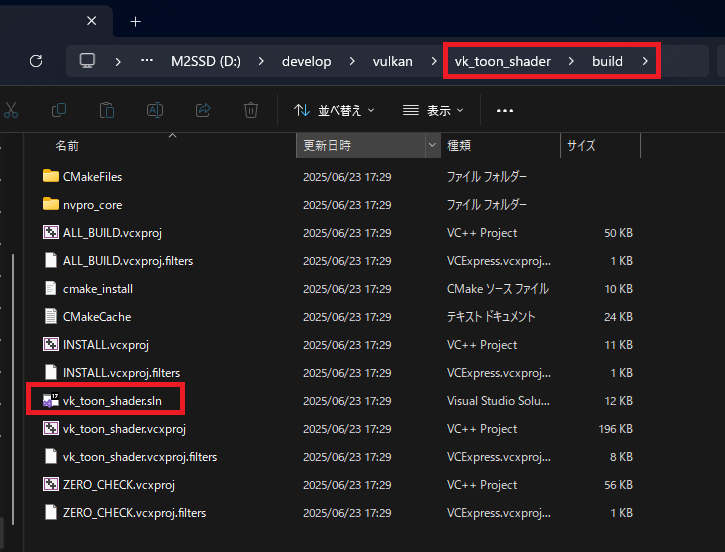
やっとサンプルを動かせるところまで来ました。ここからはコマンドプロンプトでの作業はありません。エクスプローラーでvk_toon_shaderフォルダへ移動して下さい。そのフォルダの中にbuildというフォルダが作成されているので、buildフォルダへ移動して下さい。私の環境では、D:\develop\vulkan\vk_toon_shader\buildですが、皆さんの環境に合わせて読み替えて下さい。
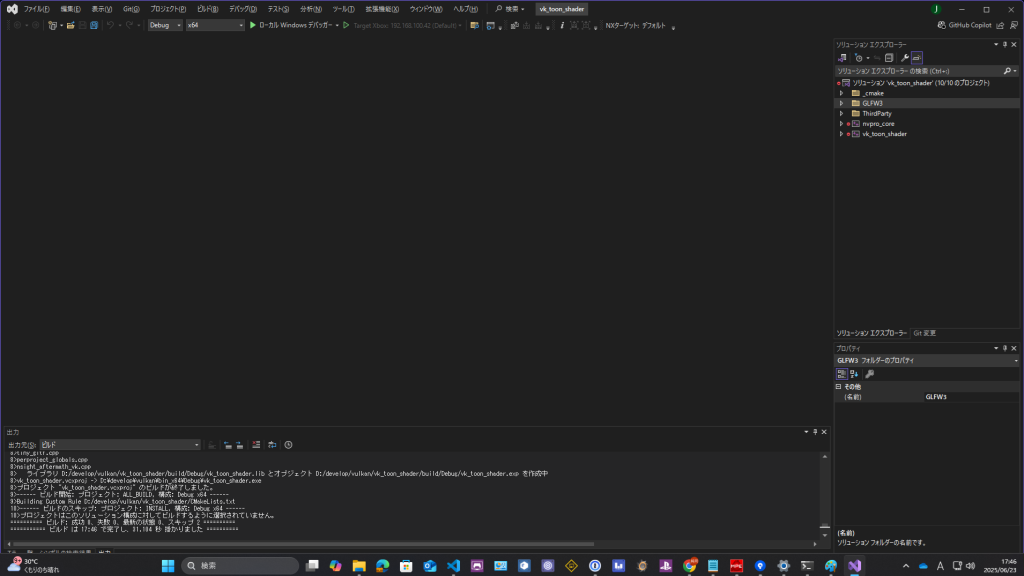
フォルダの中には、CMakeにより、vk_toon_shader.slnというVisual Studioのソリューションファイルが作成されていますので、こちらをクリックしてVisual Studioを起動します。
「ビルド」→「ソリューションのビルド」を実行してサンプルをビルドします。
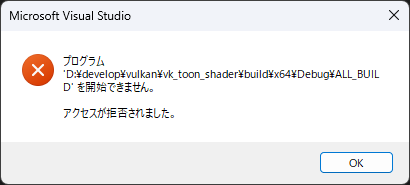
エラーが発生しなければF5で実行できるはずですが、F5を実行すると以下のようなエラーが発生して実行できません。ビルド設定に何か問題があるのかもしれませんが、デフォルト設定のままで、今回はF5での実行まで調べきれませんでした。ただ、ビルドはできています。
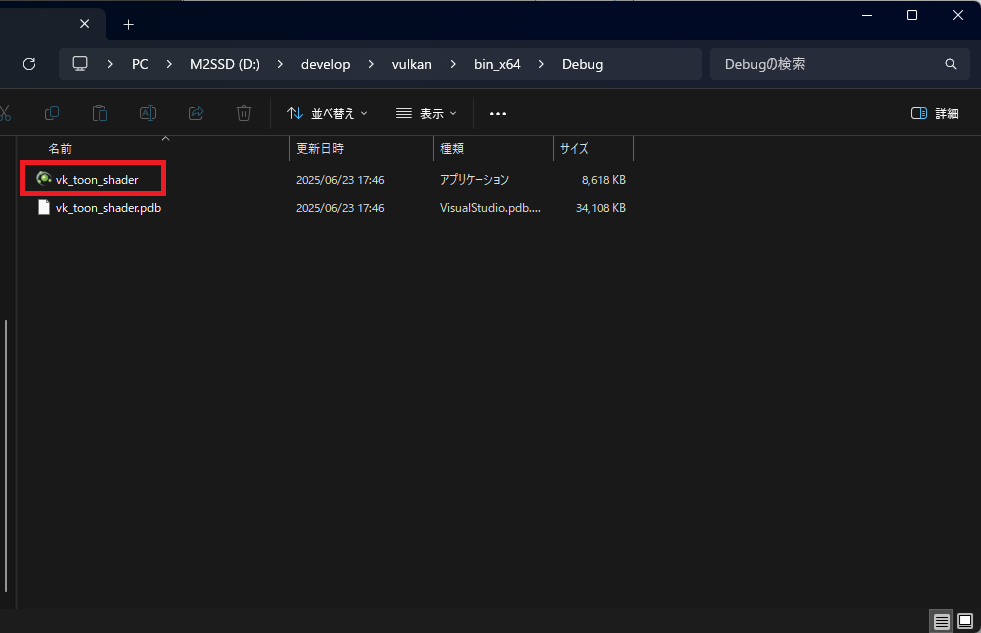
vk_toon_shaderフォルダの一つ上に移動してみると、bin_x64というフォルダが作成されています。このbin_x64\Debugに先ほどビルドしたexeファイルが作成されているはずですので、vk_toon_shader.exeをクリックして実行してみて下さい。
実行結果
こーんな画面が表示されればサンプルが正しく動いています。既にお気付きかと思いますが、このサンプルはフォルダ名がvk_toon_shaderというところからもヘルパーライブラリで作成されたToon Shadingのサンプルです。画面右側にプロパティ系のUIがあり、Line on Detailsのパラメーターを変更するとロボットモデルの輪郭が太くなったり細くなったりします。
サンプルプログラムを見てみる
それでは、このサンプルのコードを見てみたいと思います。紙面上あまり広く見ていくことはできませんので、main.cppを見てみたいと思います。以下がmain.cppのコード全てです。Vulkan SDKのCubeサンプルと比べるとかなり短いです。
int main(int argc, char** argv)
{
  // setup some basic things for the sample, logging file for example
  NVPSystem system(PROJECT_NAME);

  // Default search path for shaders
  defaultSearchPaths = {
      NVPSystem::exePath() + PROJECT_NAME,
      NVPSystem::exePath() + R"(media)",
      NVPSystem::exePath() + PROJECT_RELDIRECTORY,
      NVPSystem::exePath() + PROJECT_DOWNLOAD_RELDIRECTORY,
  };

  // Parsing the command line: mandatory '-f' for the filename of the scene
  InputParser parser(argc, argv);
  std::string filename = parser.getString("-f");
  if(parser.exist("-f"))
  {
    filename = parser.getString("-f");
  }
  else if(argc == 2 && nvh::endsWith(argv[1], ".gltf"))  // Drag&Drop on .exe
  {
    filename = argv[1];
  }
  else
  {
    filename = nvh::findFile("robot/robot.gltf", defaultSearchPaths, true);
  }

  // Setup GLFW window
  if(!glfwInit())
  {
    return 1;
  }
  glfwWindowHint(GLFW_CLIENT_API, GLFW_NO_API);
  GLFWwindow* window = glfwCreateWindow(SAMPLE_SIZE_WIDTH, SAMPLE_SIZE_HEIGHT, PROJECT_NAME, nullptr, nullptr);

  // Enabling the extension
  vk::PhysicalDeviceDescriptorIndexingFeaturesEXT feature;

  // Vulkan required extensions
  assert(glfwVulkanSupported() == 1);
  uint32_t count{0};
  auto     reqExtensions = glfwGetRequiredInstanceExtensions(&count);

  // Requesting Vulkan extensions and layers
  nvvk::ContextCreateInfo contextInfo;
  contextInfo.setVersion(1, 2);                       // Using Vulkan 1.2
  for(uint32_t ext_id = 0; ext_id < count; ext_id++)  // Adding required extensions (surface, win32, linux, ..)
    contextInfo.addInstanceExtension(reqExtensions[ext_id]);
  contextInfo.addInstanceLayer("VK_LAYER_LUNARG_monitor", true);              // FPS in titlebar
  contextInfo.addInstanceExtension(VK_EXT_DEBUG_UTILS_EXTENSION_NAME, true);  // Allow debug names
  contextInfo.addDeviceExtension(VK_KHR_SWAPCHAIN_EXTENSION_NAME);            // Enabling ability to present rendering

  // #VKRay: Activate the ray tracing extension
  contextInfo.addDeviceExtension(VK_NV_RAY_TRACING_EXTENSION_NAME, true /*optional*/);


  // Creating the Vulkan instance and device
  nvvk::Context vkctx;
  vkctx.initInstance(contextInfo);

  // Find all compatible devices
  auto compatibleDevices = vkctx.getCompatibleDevices(contextInfo);
  assert(!compatibleDevices.empty());

  // Use first compatible device
  vkctx.initDevice(compatibleDevices[0], contextInfo);

  VkToonExample example;

  // Window need to be opened to get the surface on which to draw
  vk::SurfaceKHR surface = example.getVkSurface(vkctx.m_instance, window);
  vkctx.setGCTQueueWithPresent(surface);

  example.setup(vkctx.m_instance, vkctx.m_device, vkctx.m_physicalDevice, vkctx.m_queueGCT.familyIndex);
  LOGI("Using %s \n", example.getPhysicalDevice().getProperties().deviceName.data());

  example.createSwapchain(surface, SAMPLE_SIZE_WIDTH, SAMPLE_SIZE_HEIGHT);
  example.createDepthBuffer();
  example.createRenderPass();
  example.createFrameBuffers();
  //example.createTonemapper();
  example.createAxis();
  example.createDescriptorFinal();
  example.createFinalPipeline();  // How the quad will be rendered

  example.loadScene(filename);  // Now build the example
  example.createPostProcess();  // Adding all post-effects, line extractions, ..
  example.initGUI(0);           // Using sub-pass 0


  // GLFW Callback
  example.setupGlfwCallbacks(window);
  ImGui_ImplGlfw_InitForVulkan(window, true);

  // Main loop
  while(!glfwWindowShouldClose(window))
  {
    glfwPollEvents();
    if(example.isMinimized())
      continue;

    CameraManip.updateAnim();
    example.display();  // infinitely drawing
  }


  glfwDestroyWindow(window);
  glfwTerminate();

  example.destroy();
  vkctx.deinit();


  return 0;
}
このコードの中で初期化系を行っているのが、以下の部分です。nvvk::Contextというのは、Vulkan SDKの型ではありません。ヘルパーライブラリの型です。Vulkan SDKの型はvk::XXXといった形式です。サンプルを見ると完全にVulkanで定義された型を全く使用せずにプログラミングできるわけではなさそうですが、初期化コード部分を見ても、相当ヘルパーライブラリーで肩代わりしてくれているように見えます。
  // Requesting Vulkan extensions and layers
  nvvk::ContextCreateInfo contextInfo;
  contextInfo.setVersion(1, 2);                       // Using Vulkan 1.2
  for(uint32_t ext_id = 0; ext_id < count; ext_id++)  // Adding required extensions (surface, win32, linux, ..)
    contextInfo.addInstanceExtension(reqExtensions[ext_id]);
  contextInfo.addInstanceLayer("VK_LAYER_LUNARG_monitor", true);              // FPS in titlebar
  contextInfo.addInstanceExtension(VK_EXT_DEBUG_UTILS_EXTENSION_NAME, true);  // Allow debug names
  contextInfo.addDeviceExtension(VK_KHR_SWAPCHAIN_EXTENSION_NAME);            // Enabling ability to present rendering

  // #VKRay: Activate the ray tracing extension
  contextInfo.addDeviceExtension(VK_NV_RAY_TRACING_EXTENSION_NAME, true /*optional*/);


  // Creating the Vulkan instance and device
  nvvk::Context vkctx;
  vkctx.initInstance(contextInfo);

  // Find all compatible devices
  auto compatibleDevices = vkctx.getCompatibleDevices(contextInfo);
  assert(!compatibleDevices.empty());

  // Use first compatible device
  vkctx.initDevice(compatibleDevices[0], contextInfo);

  VkToonExample example;

  // Window need to be opened to get the surface on which to draw
  vk::SurfaceKHR surface = example.getVkSurface(vkctx.m_instance, window);
  vkctx.setGCTQueueWithPresent(surface);

  example.setup(vkctx.m_instance, vkctx.m_device, vkctx.m_physicalDevice, vkctx.m_queueGCT.familyIndex);
  LOGI("Using %s \n", example.getPhysicalDevice().getProperties().deviceName.data());

  example.createSwapchain(surface, SAMPLE_SIZE_WIDTH, SAMPLE_SIZE_HEIGHT);
  example.createDepthBuffer();
  example.createRenderPass();
  example.createFrameBuffers();
  //example.createTonemapper();
  example.createAxis();
  example.createDescriptorFinal();
  example.createFinalPipeline();  // How the quad will be rendered

  example.loadScene(filename);  // Now build the example
  example.createPostProcess();  // Adding all post-effects, line extractions, ..
  example.initGUI(0);           // Using sub-pass 0
以下のインスタンスの初期化、デバイスの初期化、スワップチェーン生成関数とフレームバッファ生成関数を見てみましたが、ヘルパー関数が実装してくれているので、初期化部分の記述の煩雑さがかなり削減されるように思います。この他にもデプスバッファやレンダーパスなどの初期化系関数が用意されていました。
Vulkan インスタンス初期化関数
//--------------------------------------------------------------------------------------------------
// Create the Vulkan instance
//
bool Context::initInstance(const ContextCreateInfo& info)
{
  // #Aftermath - Initialization
  if(::isAftermathAvailable() && info.enableAftermath)
  {
    GpuCrashTracker::getInstance().initialize();
  }

  VkApplicationInfo applicationInfo{VK_STRUCTURE_TYPE_APPLICATION_INFO};
  applicationInfo.pApplicationName = info.appTitle.c_str();
  applicationInfo.pEngineName      = info.appEngine.c_str();
  applicationInfo.apiVersion       = VK_MAKE_VERSION(info.apiMajor, info.apiMinor, 0);

  m_apiMajor = info.apiMajor;
  m_apiMinor = info.apiMinor;

  if(info.verboseUsed)
  {
    uint32_t version;
    VkResult result = vkEnumerateInstanceVersion(&version);
    NVVK_CHECK(result);
    LOGI("_______________\n");
    LOGI("Vulkan Version:\n");
    LOGI(" - available:  %d.%d.%d\n", VK_VERSION_MAJOR(version), VK_VERSION_MINOR(version), VK_VERSION_PATCH(version));
    LOGI(" - requesting: %d.%d.%d\n", info.apiMajor, info.apiMinor, 0);
  }

  {
    // Get all layers
    auto layerProperties = getInstanceLayers();

    if(fillFilteredNameArray(m_usedInstanceLayers, layerProperties, info.instanceLayers) != VK_SUCCESS)
    {
      return false;
    }

    if(info.verboseAvailable)
    {
      LOGI("___________________________\n");
      LOGI("Available Instance Layers :\n");
      for(const VkLayerProperties& it : layerProperties)
      {
        LOGI("%s (v. %d.%d.%d %x) : %s\n", it.layerName, VK_VERSION_MAJOR(it.specVersion),
             VK_VERSION_MINOR(it.specVersion), VK_VERSION_PATCH(it.specVersion), it.implementationVersion, it.description);
      }
    }
  }

  {
    // Get all extensions
    auto extensionProperties = getInstanceExtensions();

    std::vector<void*> featureStructs;
    if(fillFilteredNameArray(m_usedInstanceExtensions, extensionProperties, info.instanceExtensions, featureStructs) != VK_SUCCESS)
    {
      return false;
    }

    if(info.verboseAvailable)
    {
      LOGI("\n");
      LOGI("Available Instance Extensions :\n");
      for(const VkExtensionProperties& it : extensionProperties)
      {
        LOGI("%s (v. %d)\n", it.extensionName, it.specVersion);
      }
    }
  }


  if(info.verboseUsed)
  {
    LOGI("______________________\n");
    LOGI("Used Instance Layers :\n");
    for(const auto& it : m_usedInstanceLayers)
    {
      LOGI("%s\n", it.c_str());
    }
    LOGI("\n");
    LOGI("Used Instance Extensions :\n");
    for(const auto& it : m_usedInstanceExtensions)
    {
      LOGI("%s\n", it.c_str());
    }
  }


  std::vector<const char*> usedInstanceLayers;
  std::vector<const char*> usedInstanceExtensions;
  for(const auto& it : m_usedInstanceExtensions)
  {
    usedInstanceExtensions.push_back(it.c_str());
  }
  for(const auto& it : m_usedInstanceLayers)
  {
    usedInstanceLayers.push_back(it.c_str());
  }

  VkInstanceCreateInfo instanceCreateInfo{VK_STRUCTURE_TYPE_INSTANCE_CREATE_INFO};
  instanceCreateInfo.pApplicationInfo        = &applicationInfo;
  instanceCreateInfo.enabledExtensionCount   = static_cast<uint32_t>(usedInstanceExtensions.size());
  instanceCreateInfo.ppEnabledExtensionNames = usedInstanceExtensions.data();
  instanceCreateInfo.enabledLayerCount       = static_cast<uint32_t>(usedInstanceLayers.size());
  instanceCreateInfo.ppEnabledLayerNames     = usedInstanceLayers.data();
  instanceCreateInfo.pNext                   = info.instanceCreateInfoExt;

  NVVK_CHECK(vkCreateInstance(&instanceCreateInfo, nullptr, &m_instance));

  for(const auto& it : usedInstanceExtensions)
  {
    if(strcmp(it, VK_EXT_DEBUG_UTILS_EXTENSION_NAME) == 0)
    {
      initDebugUtils();
      break;
    }
  }

  return true;
}
デバイス初期化関数
//--------------------------------------------------------------------------------------------------
// Create Vulkan device
// \p deviceIndex is the index from the list of getPhysicalDevices/getPhysicalDeviceGroups
bool Context::initDevice(uint32_t deviceIndex, const ContextCreateInfo& info)
{
  assert(m_instance != nullptr);

  VkPhysicalDeviceGroupProperties physicalGroup;
  if(info.useDeviceGroups)
  {
    auto groups = getPhysicalDeviceGroups();
    assert(deviceIndex < static_cast<uint32_t>(groups.size()));
    physicalGroup    = groups[deviceIndex];
    m_physicalDevice = physicalGroup.physicalDevices[0];
  }
  else
  {
    auto physicalDevices = getPhysicalDevices();
    assert(deviceIndex < static_cast<uint32_t>(physicalDevices.size()));
    m_physicalDevice = physicalDevices[deviceIndex];
  }

 ・
 ・
 ・
290行ほどあるので割愛
}
スワップチェーン生成関数
void nvvkhl::AppBase::createSwapchain(const vk::SurfaceKHR& surface, uint32_t width, uint32_t height, vk::Format colorFormat, vk::Format depthFormat, bool vsync)
{
  m_size        = vk::Extent2D(width, height);
  m_colorFormat = colorFormat;
  m_depthFormat = depthFormat;
  m_vsync       = vsync;

  // Find the most suitable depth format
  if(m_depthFormat == vk::Format::eUndefined)
  {
    auto feature = vk::FormatFeatureFlagBits::eDepthStencilAttachment;
    for(const auto& f : {vk::Format::eD24UnormS8Uint, vk::Format::eD32SfloatS8Uint, vk::Format::eD16UnormS8Uint})
    {
      if((m_physicalDevice.getFormatProperties(f).optimalTilingFeatures & feature) == feature)
      {
        m_depthFormat = f;
        break;
      }
    }
  }

  m_swapChain.init(m_device, m_physicalDevice, m_queue, m_graphicsQueueIndex, surface, static_cast<VkFormat>(colorFormat));
  m_size        = m_swapChain.update(m_size.width, m_size.height, vsync);
  m_colorFormat = static_cast<vk::Format>(m_swapChain.getFormat());

  // Create Synchronization Primitives
  m_waitFences.resize(m_swapChain.getImageCount());
  for(auto& fence : m_waitFences)
  {
    fence = m_device.createFence({vk::FenceCreateFlagBits::eSignaled});
  }

  // Command buffers store a reference to the frame buffer inside their render pass info
  // so for static usage without having to rebuild them each frame, we use one per frame buffer
  m_commandBuffers =
      m_device.allocateCommandBuffers({m_cmdPool, vk::CommandBufferLevel::ePrimary, m_swapChain.getImageCount()});

#ifndef NDEBUG
  for(size_t i = 0; i < m_commandBuffers.size(); i++)
  {
    std::string name = std::string("AppBase") + std::to_string(i);
    m_device.setDebugUtilsObjectNameEXT(
        {vk::ObjectType::eCommandBuffer, reinterpret_cast<const uint64_t&>(m_commandBuffers[i]), name.c_str()});
  }
#endif  // !NDEBUG

  // Setup camera
  CameraManip.setWindowSize(m_size.width, m_size.height);
}
フレームバッファ生成関数
void nvvkhl::AppBase::createFrameBuffers()
{
  // Recreate the frame buffers
  for(auto framebuffer : m_framebuffers)
  {
    m_device.destroy(framebuffer);
  }

  // Array of attachment (color, depth)
  std::array<vk::ImageView, 2> attachments;

  // Create frame buffers for every swap chain image
  vk::FramebufferCreateInfo framebufferCreateInfo;
  framebufferCreateInfo.renderPass      = m_renderPass;
  framebufferCreateInfo.attachmentCount = 2;
  framebufferCreateInfo.width           = m_size.width;
  framebufferCreateInfo.height          = m_size.height;
  framebufferCreateInfo.layers          = 1;
  framebufferCreateInfo.pAttachments    = attachments.data();

  // Create frame buffers for every swap chain image
  m_framebuffers.resize(m_swapChain.getImageCount());
  for(uint32_t i = 0; i < m_swapChain.getImageCount(); i++)
  {
    attachments[0]    = m_swapChain.getImageView(i);
    attachments[1]    = m_depthView;
    m_framebuffers[i] = m_device.createFramebuffer(framebufferCreateInfo);
  }

#ifndef NDEBUG
  for(size_t i = 0; i < m_framebuffers.size(); i++)
  {
    std::string name = std::string("AppBase") + std::to_string(i);
    m_device.setDebugUtilsObjectNameEXT(
        {vk::ObjectType::eFramebuffer, reinterpret_cast<const uint64_t&>(m_framebuffers[i]), name.c_str()});
  }
#endif  // !NDEBUG
}
これでも一部で、とにかくVulkanの初期化は長いです!
その他のサンプル
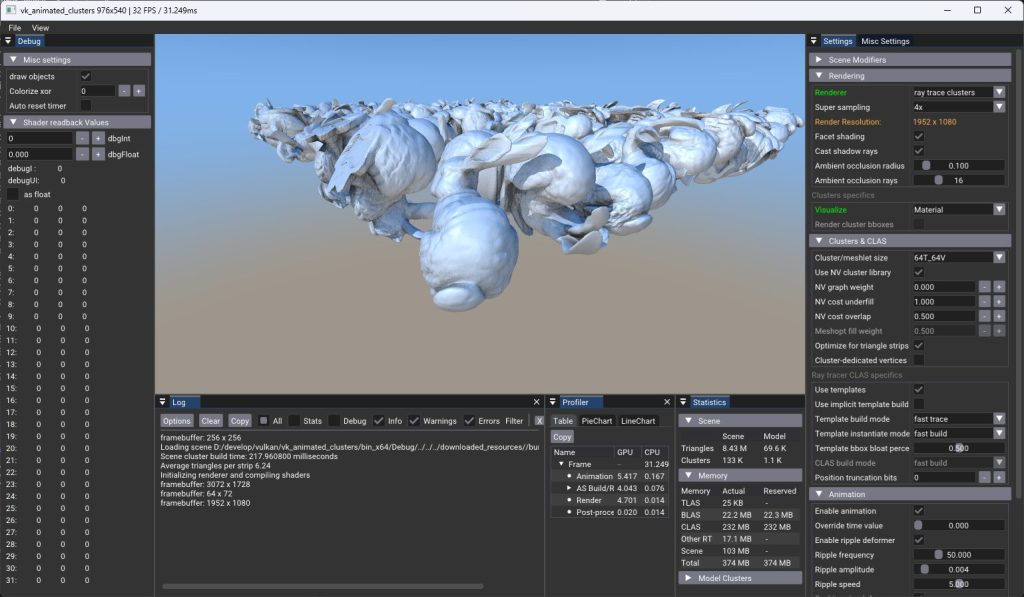
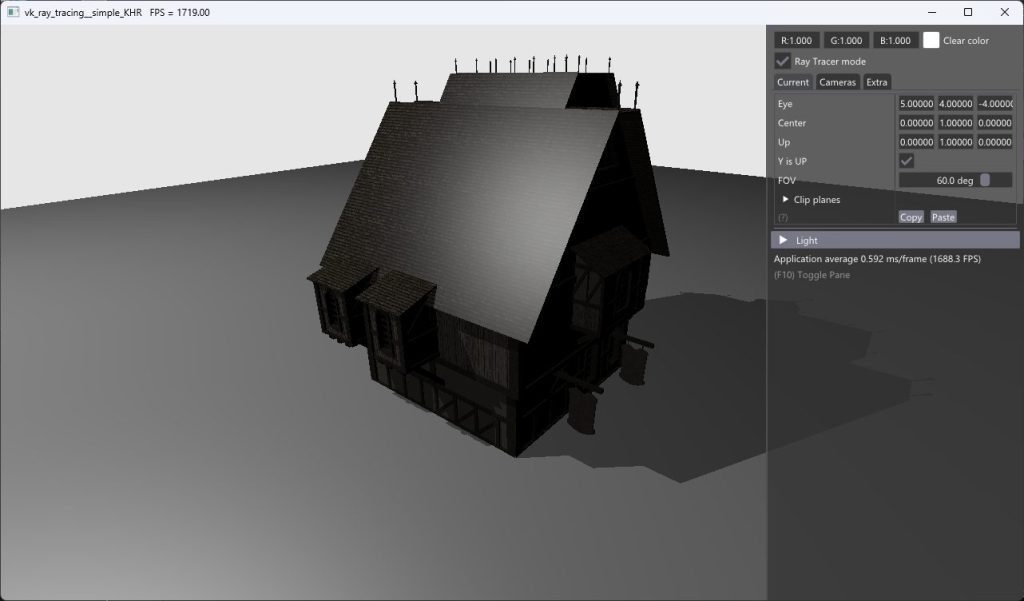
vk_toon_shader以外にも多数サンプルがあります。例えば、こんなサンプルです。これはモデルがアニメーションしています。レイトレーシングのサンプルやglTFファイルのViewerサンプルなどもありました。どのサンプルもプロパティのUIが異様に凝っています。UIの部分はどのような実装をしているのか調べきれませんでしたが、新規追加などが容易そうであればツール制作などに使えそうな気もします。時間がある時に調べてみたいと思います。
アニメーションサンプル
レイトレーシングサンプル
こちらは英語になりますが、チュートリアルもあります。
尚、その他のサンプルもビルドする際は、CMakeでVisual Studioのビルド環境を構築する必要がありますので、以下のコマンド実行を各サンプルでおこなってからビルドして下さい。
cd vk_sample_name ← cmakeを実行するサンプル名に読み替えて下さい

mkdir build

cd build

cmake ..
まとめ
今回は、Vulkanのヘルパーライブラリであるnvpro_coreとそのサンプルについて紹介しました。Vulkanの膨大な初期化コードやスワップチェーン管理などの煩雑な実装部分を肩代わりしてくれているので使いやすそうです。nvpro_coreはオープンソースなので、解析すればVulkanの理解が進むのではないかと言う印象も持ちました。また、サンプルも豊富なのでVulkanを研究するには良いヘルパーライブラリではないかと思います。
参考
nvpro samples
【免責事項】
本サイトでの情報を利用することによる損害等に対し、
株式会社ロジカルビートは一切の責任を負いません。